To Add a New Contract Job Order:
1.From the Deskflow Toolbar, click Job Orders. A pop-up list appears.
2.From the pop-up list, click Contract Job Orders. The Contract screen appears.
3.From the Contract screen, click ![]() .
.
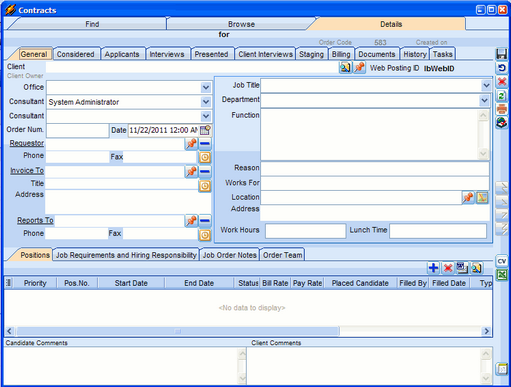
Example: Contract Job Order Data Entry Form
To Enter Contract Job Order Header:
1.To enter a Client Company name, click the red Select Client Company icon, search for the Company in the database, then click OK
2.If the Company does not exist in the database, click the Add New Company button in the Find Companies dialog box, then add the Company name. Adding a duplicate Company name will issue a warning.
3.The Client Owner field that is shown is the Owner1 field for the Company tab, and represents the consultant responsible for the selected Client Company.
4.The Office field is a property of the Client Consultant, and determines the default Location value assigned to the Job Order posting. This default value can be replaced with another value from the drop down list.
5.The first Consultant field is the Job Order consultant responsible for the Job Order. The value defaults to the Login Name of the current User, but can be re-assigned using the drop-down list.
6.The second Consultant field is the recruiter responsible for finding and screening suitable candidates for the Job Order.
7.Three client Contacts in different roles can be associated with the Job Order. The same contact person can fill all three roles, or different contacts can be selected.
8.The Order Code is system generated, and automatically increments for each new Job Order. It has a numeric value.
9.The Job Order date defaults to today’s date.
10.The Requestor/Placed By field is filled by clicking the red push pin icon, then searching for the appropriate contact at the Client Company.
11.The Invoice To/Approved by field is filled by clicking the red push pin icon, then searching for the appropriate contact at the Client Company.
12.The Reports To field is filled by clicking the red push pin icon, then searching for the appropriate contact at the Client Company.
13.The Job Title can be selected from a drop down list of standard values, or can be manually entered as text.
14.The Function (or Position Description) contains details about the open position. It is unlimited in length.
15.The Reason field is free form text.
16.The Works For field is free form text, and may not be needed if there is a Reports To name.
17.The Location field is auto-filled from Address fields in the chosen Address of the Client Company. User can customize the Location default value in Main menu > Edit > Defined Location Format from Address Data
18.The mandatory Warranty Period field must have a default value, even 0. It could also be used as the probationary period in the case of Corporate HR hires.
19.The optional Work Hours and Lunch Time fields are free text.
20.The Address field displays the full address selected for the Location field
21.After all the Job Order header information has been entered, click the Save icon.
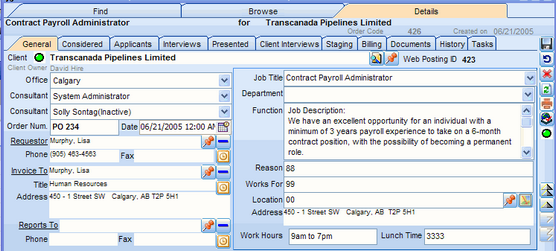
Example: Contract Job Order Header
To Enter New Contract Job Order Details:
1.Job Order details occur in the bottom third of the window and there are four sub-tabs for details: Positions-related information, Job Requirements, Job Order Notes and Order Team.
2.Each Job Order header supports one or more Position records of the same type, each having its own Priority, Start Date, End Date, Bill Rate and Pay Rate.
3.The Positions tab of a Job Order MUST have at least one Position record defined. Each position is automatically numbered, using the Job Order Code as the prefix, with a two-digit self-incrementing number as the suffix.
4.The default value for Position Status is Open, changing to Filled when a Candidate is placed in the Position.
5.The desired Start Date and Time must be selected from a calendar that is invoked by clicking the three-dots icon in the right side of the editable date cell. Do not forget to enter the start time
6.The desired End Date and Time must be selected from a calendar that is invoked by clicking the three-dots icon in the right side of the Date cell. Do not forget to enter the start time.
7.The Bill Rate is defined as the agreed upon hourly rate that the Client is to be billed.
8.The Pay Rate is defined as the agreed upon hourly rate that the Candidate is to be paid.
9.The Job Requirements and Hiring Responsibility tab of a Job Order is for optional skills required for the Position. Completing this section will add Skills questions to the auto-posted Web application forms. Candidates can then be pre-screened and ranked based on their skills.
10.To add Skills (pre-defined in the Skills Dictionary) to a Job Order, click the blue Add New Requirements icon, click Add New Skill(s), check off appropriate skills then click OK.
11. To add Role Codes to a Job Order, click the blue Add New Role Experience. Add only one Role Code per Job Order. It is used to group Job Postings into Business groupings such as Sales, Engineering, Accounting etc.
12.To add an Industry Code to a Job Order, click Add New Industry Experience. It is used to categorize Job Postings into Industry groups such as, Mining, Manufacturing, Retail Trade, etc.
Example: Contract Job Order Details
