Timesheets are entered in weekly batches from the separate Timesheets module before the billing process can be started.
The Billing tab is used to view and approve timesheets immediately prior to billing.
In the Timesheets section, click the Load Timesheets icon to display timesheets.
In the Invoices section, click the blue plus icon to add a new invoice. Select a date range for the invoice period (usually a week), accept or edit the invoice, then click OK to save the invoice.
Before a Contract Job Order Invoice can be generated, time sheet data from each contractor must be entered.
Alternatively, enter Timesheets for all current Contract Orders from the Deskflow Timesheets module
There are three ways to do this:
1.From the Billings Tab of a Contract Job Order
2.From the Time Sheets module on the Deskflow Main Menu
3.From the Deskflow Web-based time sheet data entry system
1. To Enter Time-sheets from a Contract Job Order:
1.Open the Contract Job Order and click on the General tab
2.Ensure that there is a Start Date and End Date on the Positions sub-tab
3.Ensure that the position is Filled
4.Ensure that Bill Rate and Pay Rate are correctly completed
5.From the Billing tab click the Load Time-sheets icon in the right top corner of the Time Sheets Information panel (for the time sheet to be loaded you must first fill the position)
6.Cells that are grey are outside the range of the Position Start Date and End Date, and timesheet data cannot be entered. This is a protective measure to ensure that time can only be entered within the contract period.
7.Slide the horizontal cursor bar on the bottom of the Time Sheet Information panel to the required time period for entering timesheet data.
8.Drag the mouse pointer across one or more days. The selected days will be highlighted in blue.
9.Click the blue + icon to enter Time-sheet data for each placed Candidate on this Job Order.
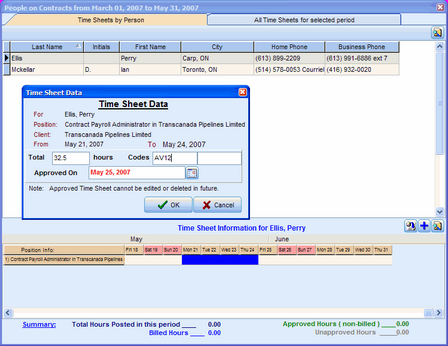
10.Enter the Total Hours worked for the selected range of days. Optionally enter Codes. Enter an Approval Date then click OK
11.To create an invoice, click the Load Contract Invoices icon in the top right corner.
12.Click the blue plus icon to add Invoice data from the time-sheets. You must enter a Start and Accrual date.
13.Click the Save icon.
14.To make changes to a previously saved invoice, click the edit invoice icon.
15.Click Print Invoices icon to preview the invoices.
16.Select the desired invoice, by double clicking and the invoice will be displayed.
17.Click the print report icon to print the invoice.
18.For entering large volumes of Time-sheets, use the main menu Time-Sheets icon or use the web-based time-sheet entry module.
Example: Time Sheets Information Entry
2. To Enter Time-sheets from Deskflow Timesheets Module:
1.Click the Time Sheets icon on Deskflow Main Menu
2.Set the Date Range to Process
3.Select Time Sheets by Person
4.Click Load Time Sheets icon
5.Cells that are grey are outside the range of the Position Start Date and End Date, and timesheet data cannot be entered. This is a protective measure to ensure that time can only be entered within the contract period.
6.Slide the horizontal cursor bar on the bottom of the Time Sheet Information panel to the required time period for entering timesheet data.
7.Drag the mouse pointer across one or more days. The selected days will be highlighted in blue.
8.Click the blue + icon to enter Time-sheet data for each placed Candidate on this Job Order.
9.Enter the Total Hours worked for the selected range of days. Optionally enter Codes. Enter an Approval Date then click OK
Example: Set Date Range to Process
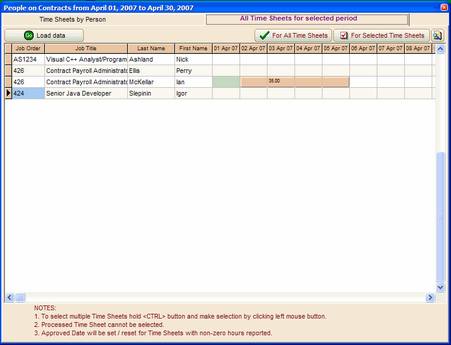
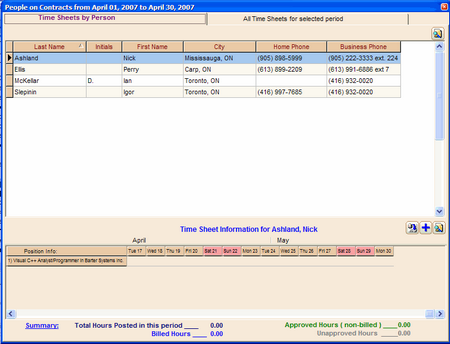
Example: Time Sheets for People on Contract
Example: All Time Sheets for Period