To Perform People Browse List Actions:
The following icons are in the right margin of a People browse list & perform actions on the list of People.
To Navigate from record to record in a detail view:
•Click the Move Next icon to move to the next record in the browse list sequence.
•Click the Move Previous icon to move to the previous record in the browse list sequence.
•Click the Move First icon to move to the first record in the browse list sequence.
•Click the Move Last icon to move to the last record in the browse list sequence.
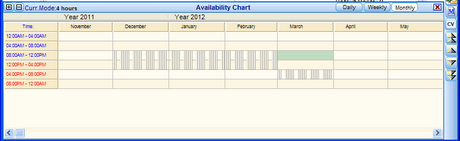
To Show a Person's Availability Chart:
1.Select a Person in the Browse list.
2.Click the Show Availability Chart icon, ![]() .
.
3.The Person's availability is displayed at the bottom of the window.
4.Set the vertical Time-scale with plus and minus buttons.
5.Set the horizontal columns to Daily, Weekly or Monthly.
6.Click the x button to close the Availability Chart.
Example: Person Availability Chart
To Create a New Activity History record:
1.Select a Person in the Browse list
2.Click the Create New Activity History Record icon (ALT+H), ![]() .
.
3.Select Activity Type from drop down list (default is Note).
4.Enter Description.
5.Optionally click Notify Users about this record and select target Users.
6.Enter optional Notes, unlimited in length.
7.Enter optional Participants.
8.Enter optional Links to other objects.
9.Optionally schedule a followup Task, Phone Call or Appointment.
10.Click OK.
To Print a List of People Using a Selected Report:
1.Click Print. The Report Manager screen appears.
2.All folders and reports can be accessed.
To Create a New Activity History Record:
1.Select a row in the People Browse window, then click H.
2.Enter activity history information on the selected person.
3.Additionally, create a task from the Activity History Record dialog box by clicking Create Task.
To Show Resumes/CVs from a Browse list:
1.Click the Show Resumes icon, ![]() .
.
2.Scroll up and down the list to quickly review text format resumes.
3.To open the original Resume/CV, double-click on a row containing a Resume/CV reference.
To Hide Resumes/CVs from a Browse list:
1.Click the Hide Resumes icon ![]() .
.
To Make Batch Changes to People in the List:
1.Create a new People list or select an existing People list.
2.Click the Make Batch Changes to People in List icon.
3.Select the required fields to update. See details in Make Batch Changes to People in List
To Export a List of People to Excel:
1.From the Browse window, click the Excel icon, ![]() . The Export to Excel dialog box appears.
. The Export to Excel dialog box appears.
2.Select an existing Format Name or click the Add New Format icon, ![]() .
.
3.Click the Select Folder icon and find a destination folder location for the exported Excel document.
4.Enter a File Name for the file to be exported.
5.Optionally click the Extract Resumes to Sub-folder check box in order copy resumes/CVs referenced in the Excel spreadsheet. If necessary, modify the sub-folder name or leave it set to the default name.
6.Click the Add Field icon (or Delete Field icon) to customize the columns to be exported to Excel.
7.Click Export.
To Create an HTML Template for Broadcast purposes:
1.Use MS Word to create a document with graphics, animation, hotlinks etc.
2.Click File > Save As > Save as type: Web Page (*.htm; *.html).
3.Create a new Word template in Deskflow.
4.Embed a query in the Word template.
5.Edit the Word template and add at least one mail merge field. It can be made invisible by setting foreground and background to white. If a mail merge field is not included in the template, randomly named errors will occur.
6.In the Word template, click File > Insert > Web Page document (from step 2).
7.Save the Word template after the Web page has been inserted.
8.In Deskflow, send a mass email from a List using the new Word template.
To Send Templated Email to a List of People:
1.From the Browse window, click Outlook located on the far right of the Browse window. The Select Email Options dialog box appears.
2.Select the radial button called Selected Names in the List.
OR
All Names in the List.
3.Select Compose Your Email Using a Template in the Email Composition Options dialog box.
4.Select Messages will be sent in format of HTML or Rich Text Format. Preferably select HTML.
NOTE: HTML format will not allow the Send Later option to be chosen, but the Rich Text Format option and the Plain Text format will allow selection of the Send Later option.
5.Select the sending Priority. The default setting is Normal but select High to speed transmission.
6.Click Choose a template to use as the body of your email to select an appropriate Word template.
7.Enter the email Subject in the field Enter the subject of your email.
8.Select Now or Later in the field Would you like to send this message now or later?.
9.Select document attachments from the Deskflow Document Search Dialog.
10.In the DB space saving options section, check theses required boxes:
•Save Copies of Email Messages Into Database
•Copy Email Body Text Into Activity History Notes (selected by default)
•Save Copies of Email Messages In Outlook Sent Items Folder (selected by default)
14.Click OK.
15.A copy of the email will be saved in each recipient's profile if the email archive flag is set.
NOTE: When sending a templated email, a separate email is sent to each recipient in the list, therefore a BCC is not required.
To Send Email to a List of People:
1.From the Browse window, click Outlook icon located on the far right of the Browse window. The Select Email Options dialog box appears.
2.Select the radial button called Selected Names in the list.
3.Select Compose Your Own Email.
4.Select BCC or TO option.
5.Click OK.
6.Attach external documents or Deskflow documents to the Outlook email.
7.Click Send.
8.A copy of the email will be saved in each recipient's profile if the email archive flag is set.
Resume/CV Parsing
Data automatically parsed or extracted from Resumes/CVs may be used to refresh data on Candidate records.
The Deskflow Resume Processor can identify and update these fields:
Home Phone, Work Phone, Mobile Phone, Email address, Address data.
If the Sovren Parser module is installed then these fields can be identified and updated:
Home Phone, Work Phone, Mobile Phone, Email address, Address data, Education, Employment-related responsibilities, Employment-related skills/keywords, Employment start and end dates, Employer name, Job Title.
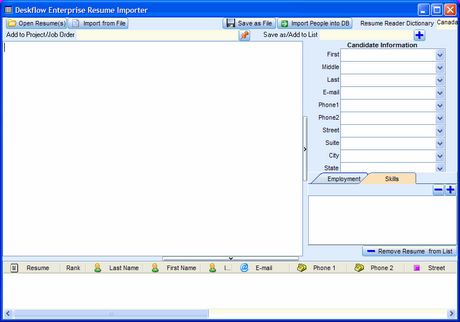
To Extract Information from Resumes/CVs in Database:
To see details of the Sovren Parser, refer to topic called Import People from Resume
else
1.Click Extract Information From Resumes In DB. The Resume Importer screen appears with all of the People that were initially populated in the Browse window.
2.Click the Check boxes of the fields to be updated (located along the right side of the Resume Processor). Enter information if it is not extracted from the resume itself or edit the information that was extracted.
3.Click Update People Info located at the top of the Resume Processor screen.
4.Wait for the message: Update Finished, then click OK. The Resume Processor screen remains open and all information has been updated to the People records in Deskflow.
5.Click the red X on the top right of the Resume Processor screen to close it.
Example: Deskflow Enterprise Resume Importer (different from Sovren Parser)